 Save
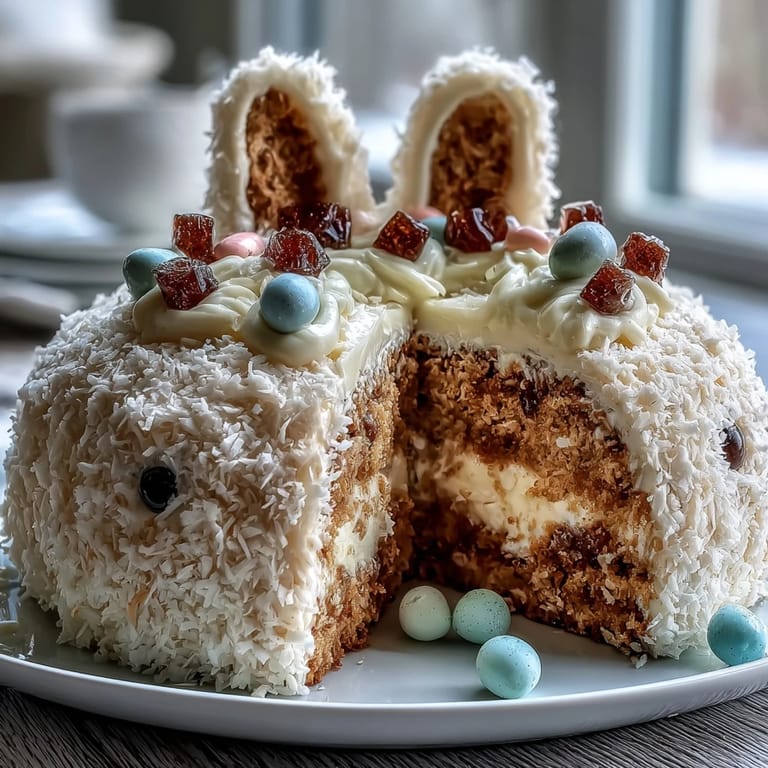
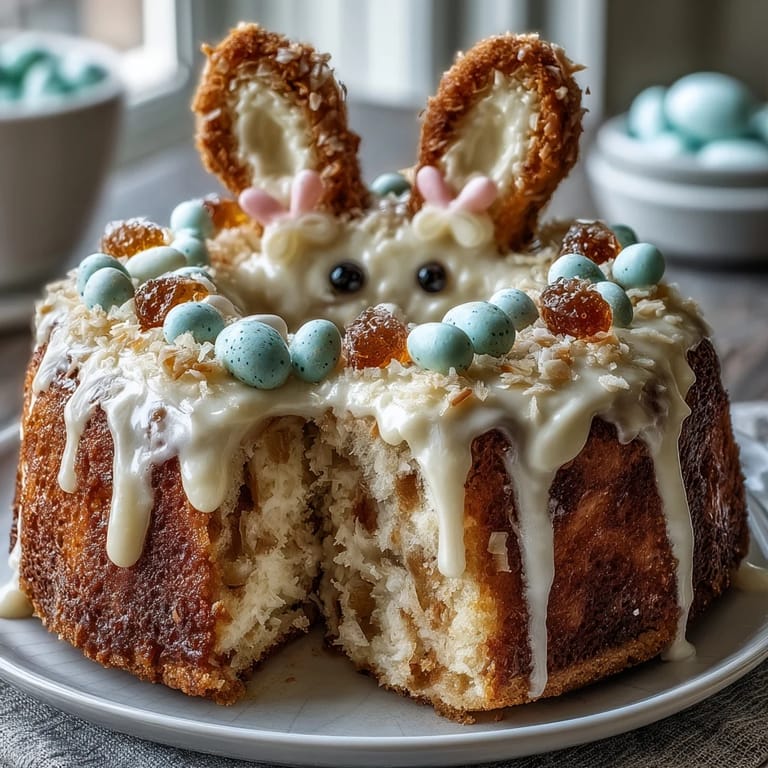
Save My daughter pressed her nose against the bakery window and pointed at an Easter bunny cake, her eyes wide with wonder. That afternoon, flour dusted my kitchen in places I didn't know flour could reach, but watching her face light up when I carried out this whimsical bunny made every messy moment worth it. There's something magical about transforming two simple cake layers into a creature that makes kids forget to ask for store-bought desserts. This Easter Bunny Cake has since become our spring tradition, the one thing she requests before I even mention holiday plans.
I'll never forget Easter morning when my nephew arrived early and discovered me still frosting the bunny's ears in my kitchen. Instead of hiding the cake, I handed him the piping bag and we finished decorating together, his tongue poking out in concentration as he added marshmallow cheeks. By the time his parents arrived, he felt like the cake's co-creator, proudly telling everyone exactly how each jelly bean eye was positioned. That's when I realized this recipe isn't just about feeding people—it's about creating moments of connection wrapped in coconut frosting.
Ingredients
- All-purpose flour (2 ½ cups): The foundation of a tender crumb; sifting it once prevents dense pockets that ruin the delicate texture.
- Baking powder (2 ½ tsp): This amount ensures the cake rises evenly and stays light enough that the frosting doesn't weigh it down.
- Unsalted butter (1 cup for cake, 1 cup for frosting): Using softened butter at room temperature creams more efficiently, trapping air that makes the cake fluffy.
- Granulated sugar (2 cups): Beating it with butter for a full three minutes creates tiny air pockets that give the cake its tender crumb.
- Eggs (4 large): Room-temperature eggs blend seamlessly and add structure; cold eggs create lumps no amount of beating can fix.
- Pure vanilla extract (1 tbsp for cake, 1 ½ tsp for frosting): The real extract matters here—imitation tastes sharp in a delicate vanilla cake.
- Whole milk (1 cup for cake, ¼ cup for frosting): The alternating method of adding flour and milk prevents overmixing, which toughens the crumb.
- Powdered sugar (4 cups, sifted): Sifting removes lumps before mixing, ensuring the frosting stays silky and spreadable.
- Sweetened shredded coconut (2 cups): Press it gently onto the frosting while it's still slightly sticky so it adheres and creates that fluffy bunny effect.
- Decorative elements (jelly beans, licorice, marshmallows, chocolate chips): Choose sturdy candies that won't bleed color into the frosting; test them on a small patch first.
Tired of Takeout? 🥡
Get 10 meals you can make faster than delivery arrives. Seriously.
One email. No spam. Unsubscribe anytime.
Instructions
- Prepare your pans and preheat:
- Set the oven to 350°F and thoroughly grease and flour two 9-inch round pans, tapping out excess flour so the cake edges release cleanly. Having everything ready before you start mixing prevents scrambling later.
- Combine dry ingredients:
- Whisk the flour, baking powder, and salt in a bowl—this distributes the leavening evenly throughout the batter. Don't skip whisking; it matters more than you'd think.
- Cream butter and sugar:
- Beat softened butter and sugar for a full three minutes until it's pale and fluffy, stopping to scrape the bowl's sides. You're aerating the mixture, which is what makes the cake tender rather than dense.
- Incorporate eggs and vanilla:
- Add eggs one at a time, beating after each addition until the mixture looks smooth before the next egg goes in. This gradual approach prevents the batter from breaking or looking curdled.
- Alternate wet and dry ingredients:
- Beginning with the flour mixture, add it to the butter mixture, then milk, then flour again, ending with flour to keep everything stable. Overmixing at this stage develops gluten and makes the cake tough, so stop as soon as everything comes together.
- Divide and bake:
- Pour equal amounts into each pan, smooth the tops, and bake for 30-35 minutes until a toothpick emerges clean and the tops spring back lightly when touched. The kitchen will smell like vanilla heaven—resist opening the oven door before the timer.
- Cool properly:
- Let the cakes rest in their pans for ten minutes so the structure sets, then turn them out onto wire racks to cool completely, which takes about an hour. Frosting warm cake turns into a melty mess, so patience here prevents frustration later.
- Make the frosting:
- Beat softened butter until it's creamy, then gradually add the sifted powdered sugar, milk, and vanilla, beating until light and fluffy, about two minutes. This slow addition prevents powdered sugar clouds from coating your entire kitchen.
- Tint the accent frosting:
- Set aside half a cup of white frosting and mix in pink food coloring drop by drop until you reach the shade you want. A little goes a long way—you can always add more, but you can't remove it.
- Assemble the bunny shape:
- Cut one cake round into two ear shapes and a bow tie using a serrated knife and a cutting guide, then arrange everything on a large board: round cake for the face, ear shapes positioned above, and the bow tie below. Take your time here because the arrangement is what makes this cake special.
- Apply the crumb coat:
- Spread a thin layer of white frosting over the entire cake structure, covering all the crumbs, then refrigerate for fifteen minutes so the frosting sets slightly. This base layer prevents crumbs from mixing into your final frosting coat.
- Frost and coconutify:
- Generously apply the remaining white frosting to every surface, then press shredded coconut onto the still-tacky frosting while working section by section. The coconut sticks better this way and creates that wonderful fluffy bunny texture.
- Add the finishing touches:
- Pipe or spread pink frosting into the inner ears and nose, then arrange jelly beans for eyes, licorice strings for whiskers, and marshmallows for cheeks and a tail. Let your creativity guide you here—there's no wrong way to decorate.
 Save
Save One Easter, I frosted this bunny with my aging grandmother, who hadn't baked in years because her arthritis made it difficult to hold tools. She sat beside me, directing where each marshmallow cheek should go and laughing at how serious I was about getting the whiskers symmetrical. When we finally stepped back to admire our work, she squeezed my hand and said it was the most fun she'd had in months. That cake taught me that some recipes aren't about perfection—they're about the moments you build while making something beautiful together.
Timing and Make-Ahead Strategy
The beauty of this recipe is its flexibility with timing. Bake the cake layers a full day ahead and wrap them tightly in plastic wrap—they actually stay moister overnight and are easier to cut when slightly stale. Make the frosting the morning of serving and store it in an airtight container at room temperature; it'll stay spreadable and perfect for the hour or two before decorating. Assembly should happen no more than three hours before serving so the coconut stays fresh-looking and the candy decorations don't have time to soften or shift.
Adapting to Your Preferences
While this recipe shines with coconut frosting, I've experimented with plenty of variations depending on who's eating it. Cream cheese frosting creates a tangier, less sweet alternative that grown-ups often prefer, and toasting the coconut beforehand adds deeper, almost caramel-like notes. Some years I've substituted almond extract for half the vanilla, which creates an unexpected floral hint that pairs beautifully with the coconut. Don't be afraid to play around—the cake itself is sturdy enough to handle different frosting personalities.
Decorating Secrets and Safety Tips
The decorating step is where this cake transforms from a regular cake into something magical, but a few practical lessons have saved my sanity. Test any colored candies on a small frosting patch first because some food dyes bleed and stain the white frosting unexpectedly. Arrange your decorations in order of application—eyes and nose first, then whiskers, then heavier items like marshmallow cheeks and tail so nothing shifts or sinks. Always check candy packaging for allergy information, especially if you're making this for kids with dietary restrictions, and keep a backup decoration plan in case something breaks or rolls away mid-decorating.
- Apply decorations from top to bottom so your hands don't accidentally smudge the frosting you've already finished.
- Use a small offset spatula or butter knife to gently adjust frosting and position delicate decorations without leaving fingerprints.
- If the bunny is for a child's birthday, double-check that all decorative items are firmly attached so nothing becomes a choking hazard.
 Save
Save This Easter Bunny Cake has become the dessert that makes people pause before eating—they want to photograph it first, and somehow that moment of appreciation feels like the whole point. Whether you're making it for your first Easter or your fifteenth, I hope this recipe brings as much joy to your kitchen as it has to mine.
Recipe Questions
- → What type of flour is best for this cake?
All-purpose flour provides the right balance of structure and tenderness for the soft vanilla layers.
- → Can I substitute the coconut in the frosting?
Yes, toasted coconut can enhance flavor or cream cheese frosting offers a tangy alternative to complement the sweetness.
- → How do I shape the bunny's ears and face?
Use a serrated knife to cut one cake layer into ear shapes and a round shape for the face, arranging them on a board before frosting.
- → What is the purpose of the crumb coat?
The thin layer of frosting seals crumbs, creating a smooth surface for the final frosting and coconut layer.
- → Are there any tips for decorating the bunny features?
Use pink-tinted frosting for the ears and nose, licorice strings for whiskers, and candies or marshmallows to add charming details.