 Save
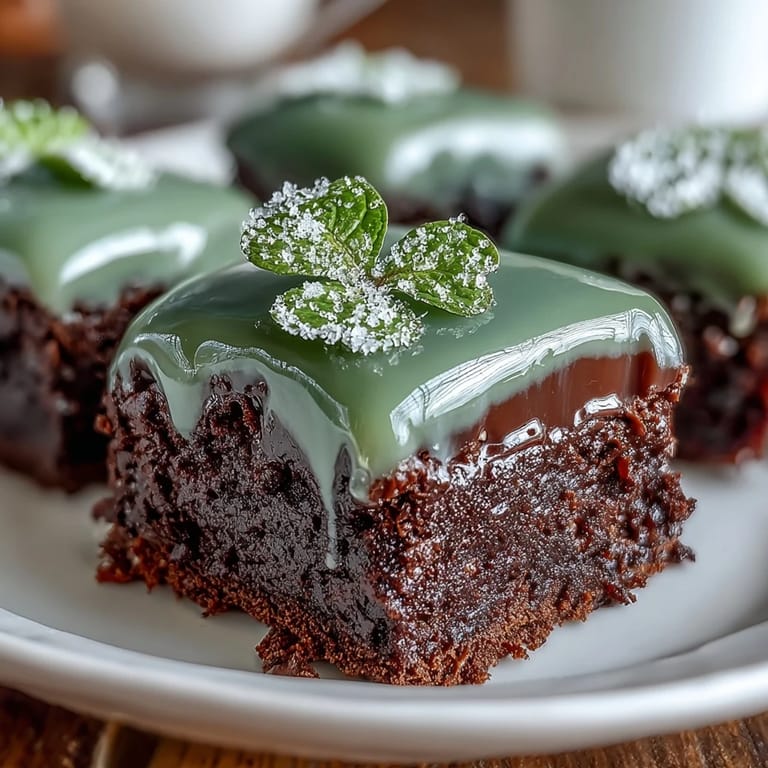
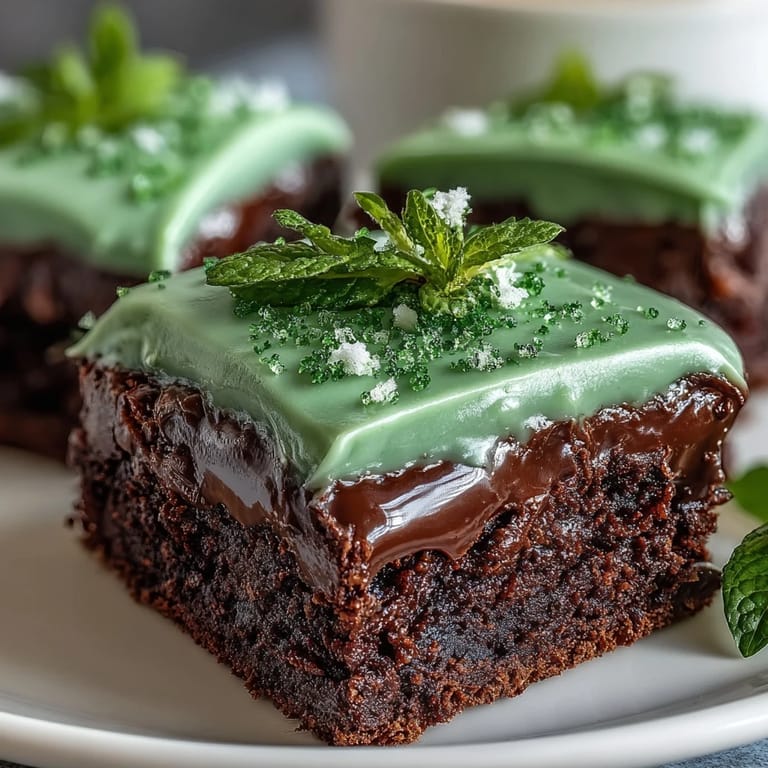
Save My kitchen smelled like cocoa and butter the morning my daughter announced she wanted to bring something green to her classroom St. Patrick's Day party, and these shamrock brownies became the answer to that challenge. There's something magical about transforming a simple chocolate base into something festive without losing that fudgy richness everyone craves. The first batch I made, I honestly wasn't sure cutting brownies with a cookie cutter would work, but watching those perfect little shamrocks emerge from the pan felt like discovering a secret trick. Now every March, someone asks me to make them again, and I know it's because the combination of dark chocolate and bright green icing just works.
I'll never forget frosting these while my son sat at the kitchen counter mixing food coloring drops into milk, asking endless questions about why green is lucky. What started as a holiday obligation turned into one of our favorite kitchen rituals, and now he insists on helping with the icing every single year. Those moments matter more than the dessert itself, but the dessert makes those moments happen.
Ingredients
- Unsalted butter (1/2 cup): Melt it low and slow so it doesn't brown, then let it cool just slightly before mixing with sugar and eggs to avoid scrambling them.
- Granulated sugar (1 cup): This dissolves into the butter-egg mixture and creates that signature fudgy texture that makes these special.
- Large eggs (2): Room temperature eggs blend more smoothly and create a better emulsion with the butter.
- Vanilla extract (1 teaspoon): Use real vanilla if you have it, as it deepens the chocolate flavor in unexpected ways.
- Unsweetened cocoa powder (1/3 cup): Don't skip the cocoa—it's what makes these taste like actual brownies and not just chocolate cake.
- All-purpose flour (1/2 cup): Measure by spooning and leveling, never scooping directly from the bag, or you'll end up with dense brownies.
- Salt (1/4 teaspoon): A small amount amplifies the chocolate flavor, so don't skip it thinking it won't matter.
- Baking powder (1/4 teaspoon): Just enough to give them a slight lift without making them cake-like.
- Powdered sugar (1 1/2 cups): Sift this if it's lumpy, or you'll end up with grainy icing that feels gritty.
- Softened butter for icing (2 tablespoons): Truly softened butter, not melted, creates smooth icing that spreads without tearing the brownies.
- Milk (2 tablespoons): This thins the icing to spreadable consistency without making it glossy.
- Green food coloring: Add it drop by drop, stirring between each addition, so you don't overshoot and end up with neon green.
- Green sprinkles or sanding sugar (optional): These catch the light and make the shamrocks look intentional and finished.
Tired of Takeout? 🥡
Get 10 meals you can make faster than delivery arrives. Seriously.
One email. No spam. Unsubscribe anytime.
Instructions
- Prep your pan and heat your oven:
- Line an 8x8-inch pan with parchment paper, leaving overhang so you can lift everything out once cool. Set your oven to 350°F and let it reach temperature while you mix the batter.
- Melt and combine the butter mixture:
- Melt butter over low heat, then remove from heat and stir in sugar, eggs, and vanilla until smooth and glossy. This should take about a minute of stirring, and you'll see the mixture lighten slightly as air gets incorporated.
- Mix in the dry ingredients gently:
- Add cocoa powder, flour, salt, and baking powder, then stir until just barely combined. The moment you don't see streaks of flour anymore, stop—overmixing develops gluten and makes them tough instead of fudgy.
- Bake until just done:
- Pour batter into your pan and smooth the top with a spatula. Bake 25-30 minutes until a toothpick pulled from the center has just a few moist crumbs clinging to it, not wet batter.
- Cool completely before decorating:
- Let the brownies rest in the pan on a cooling rack until they reach room temperature, which takes about 45 minutes. This prevents the warm brownie from breaking when you cut it with the cookie cutter.
- Make the icing while waiting:
- Beat together powdered sugar, softened butter, milk, and vanilla until smooth. Add green food coloring a drop at a time, stirring well between additions, until you reach a shade that makes you happy.
- Cut into shamrocks with intention:
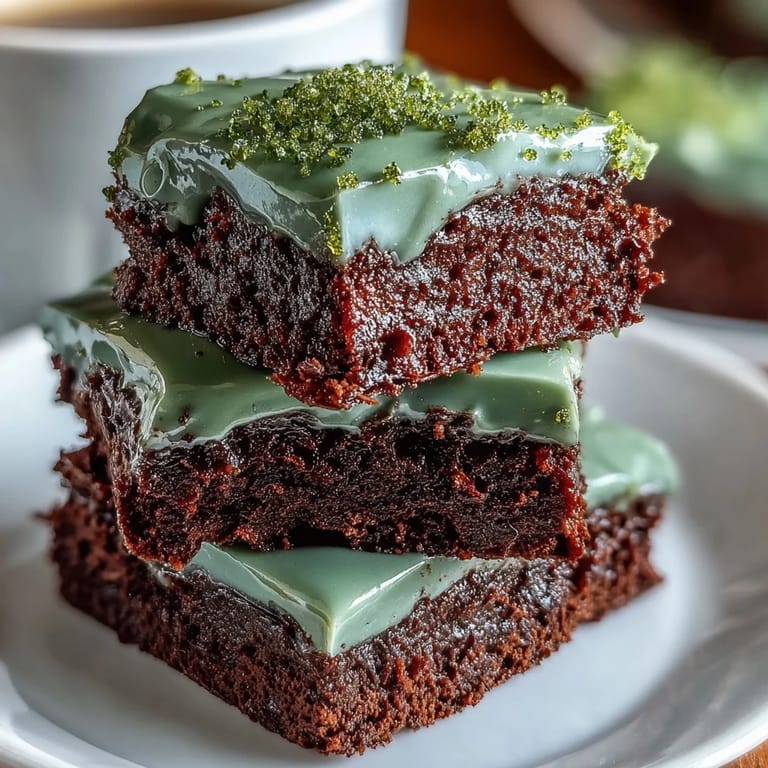
- Lift the cooled brownies from the pan using the parchment overhang. Using a shamrock-shaped cookie cutter, press straight down and wiggle gently to release each shape, wiping the cutter clean between cuts so you get crisp edges.
- Frost and decorate:
- Spread a spoonful of icing onto each shamrock brownie, smoothing it with the back of a spoon or an offset spatula. Immediately add green sprinkles or sanding sugar if using, before the icing sets.
- Let the icing set:
- Give the frosted shamrocks about 15 minutes on the counter for the icing to firm up before serving or transporting them.
 Save
Save There's a particular joy in seeing someone's face light up when they realize the shamrock is actually chocolate underneath the green icing. These brownies have a way of turning a simple classroom party or family gathering into something memorable, which is honestly what cooking is really about.
Handling Your Brownie Scraps
You'll have leftover brownie bits from cutting the shamrocks, and throwing them away feels wrong. Crumble them over vanilla ice cream for an instant dessert, or press them into the bottom of a cup with a little butter for an emergency brownie cookie situation. I've also frozen the scraps and used them weeks later in a brownie trifle, so nothing goes to waste.
Storage and Make-Ahead Tips
These brownies stay soft and delicious in an airtight container at room temperature for up to three days, though they rarely last that long. You can bake and cool the brownies up to two days ahead, then frost them on the morning you need them for maximum freshness. If you're making these for an event, cut them the night before and store them unfrosted, then add icing a few hours before serving so it looks freshly made.
Customizing Your Shamrocks
Once you master the basic recipe, these brownies become a canvas for your own ideas. I've mixed mini chocolate chips into the batter for extra texture, added chopped walnuts for a little crunch, and even tried a hint of peppermint extract for a festive twist. The icing is just as flexible—swap the milk for cream for a richer frosting, or use almond extract instead of vanilla for something different. Here are a few tweaks worth trying:
- Stir mini chocolate chips or chopped nuts into the batter for added texture and richness.
- Replace one tablespoon of milk with cream in the icing for a lusher, more luxurious frosting.
- Add a small pinch of peppermint or almond extract to the icing for subtle flavor variations.
 Save
Save These shamrock brownies have become my answer to the question of how to make something feel celebratory without overcomplicating it. They're proof that a little festive shape and bright green icing can turn an ordinary brownie into something people actually remember.
Recipe Questions
- → What helps achieve a fudgy texture in these brownies?
The combination of melted butter, eggs, and careful mixing ensures a dense and fudgy brownie texture rather than cakey.
- → How do I get the vibrant green color in the icing?
Add green food coloring a few drops at a time to the icing mixture until the desired shade is reached for a festive look.
- → Can I make the brownies ahead for an event?
Yes, brownies can be baked and cooled in advance, then iced and decorated shortly before serving to keep the icing fresh.
- → What is the best way to cut out the shamrock shapes?
Use a metal shamrock cookie cutter for clean, easy cuts, wiping the cutter between each to prevent sticking.
- → How should the brownies be stored after decorating?
Store the iced brownies in an airtight container at room temperature for up to three days to maintain freshness.
- → Can I add ingredients for extra texture?
Yes, mini chocolate chips or chopped nuts can be mixed into the batter to enhance texture and flavor.