 Save
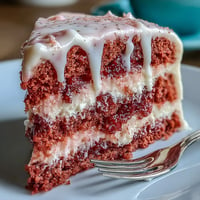
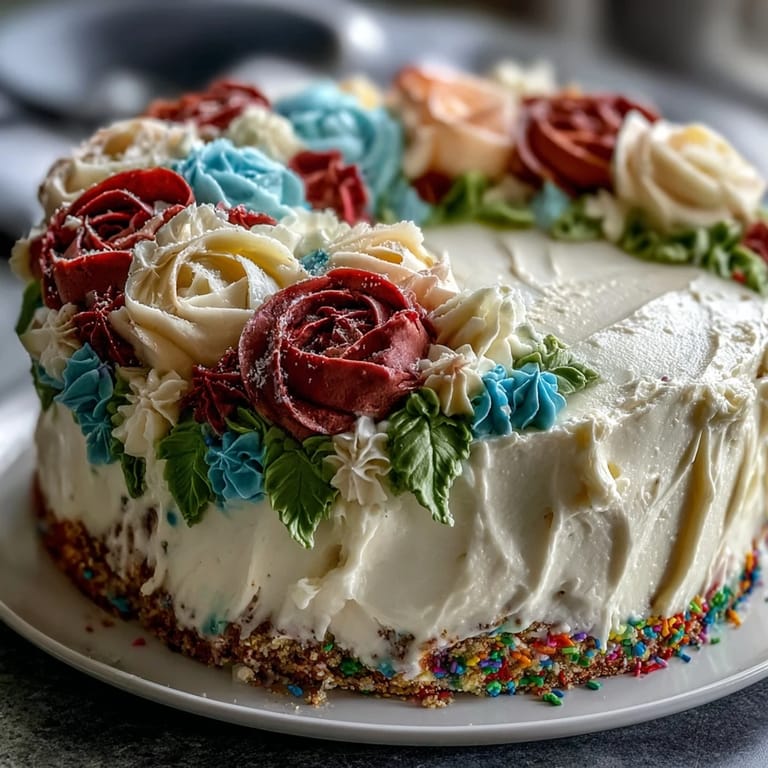
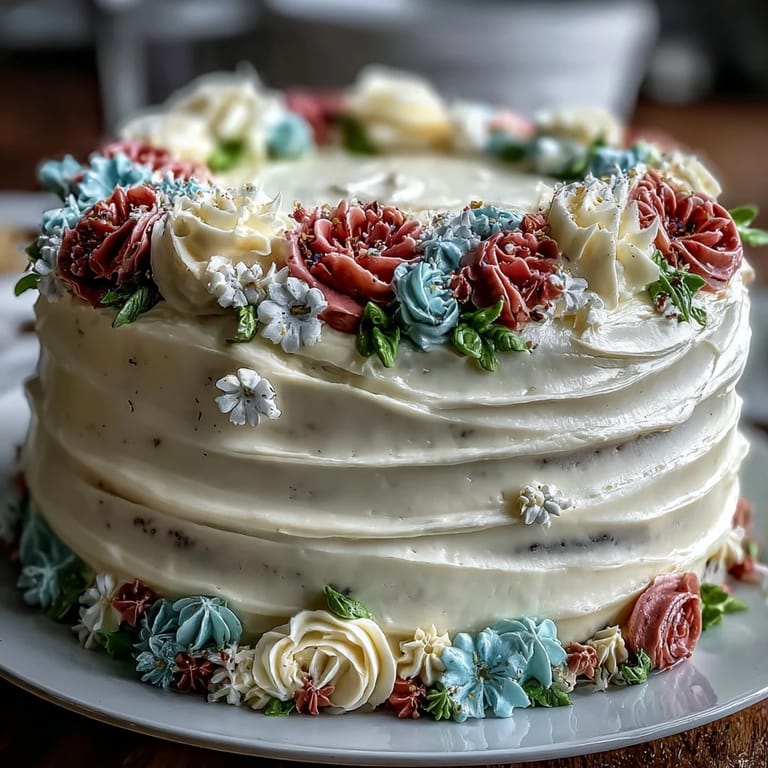
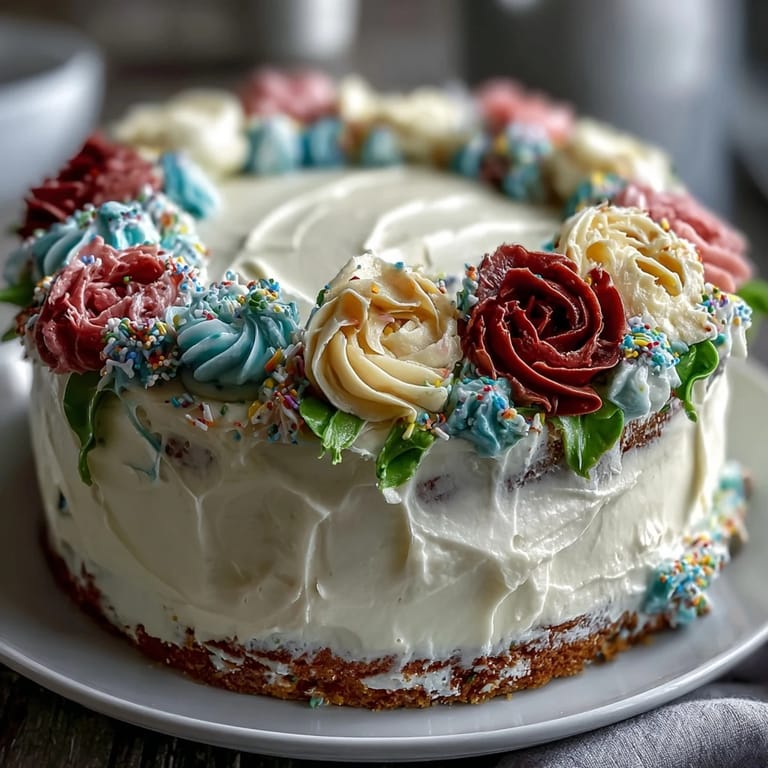
Save My friend texted me three weeks before her graduation asking if I could make her a cake, and honestly, I panicked a little. She wanted it elegant but not pretentious, something that would look like it belonged on a magazine cover but tasted like genuine celebration. That's when I landed on this sheet cake with buttercream roses—it's the kind of dessert that feels like a big moment without requiring you to be a pastry chef. The vanilla cake stays impossibly moist, the buttercream pipes like a dream, and those roses? They turn anyone into an artist.
I'll never forget watching my friend's face when she saw it sitting on the dessert table at her graduation party. She actually teared up, which made me tear up, which made everyone else emotional about a cake—and isn't that the whole point of cooking for people you love?
Ingredients
- All-purpose flour (3 cups): The foundation of a tender crumb; make sure it's measured by spooning and leveling, not scooping straight from the bag, or you'll end up with a dense cake.
- Baking powder and baking soda (2½ tsp and ½ tsp): These are your lift—they work together to give you that cloud-like texture, but don't skip sifting the dry ingredients or you'll get lumps.
- Unsalted butter (1 cup plus 1½ cups): Room temperature is non-negotiable here; cold butter won't cream properly and you'll lose all that air you're trying to trap.
- Granulated sugar (2 cups): This creams with the butter to create the base of your cake structure; the tiny air pockets are what make it light and tender.
- Eggs (4 large): Room temperature eggs blend smoothly into the batter; cold ones will separate and create a grainy texture you don't want.
- Vanilla extract (1 tbsp plus 2 tsp): Use pure vanilla, not imitation—you'll taste the difference, especially in something this simple and elegant.
- Whole milk (1¼ cups plus ¼ cup): Room temperature milk incorporates evenly; cold milk can cause the batter to seize and split.
- Powdered sugar (6 cups): Sift it before you measure, or you'll end up with dense, grainy buttercream that won't pipe smoothly.
- Gel food coloring: Gel holds its vibrancy without adding liquid like liquid coloring does; a tiny dab goes a long way, so start conservative.
Tired of Takeout? 🥡
Get 10 meals you can make faster than delivery arrives. Seriously.
One email. No spam. Unsubscribe anytime.
Instructions
- Prep your pan:
- Preheat your oven to 350°F and get a 12x18-inch sheet pan lined with parchment paper. Grease the sides well so the cake releases cleanly.
- Mix your dry ingredients:
- Whisk together the flour, baking powder, baking soda, and salt in a medium bowl. This distributes the leavening agents evenly so you don't get sudden pockets of bitterness from baking soda.
- Cream the butter and sugar:
- Beat them together for 3-4 minutes until it's pale and fluffy—you should see the mixture almost double in volume. This is where the magic happens; you're trapping air that will make your cake light.
- Add eggs one at a time:
- Beat well after each egg so it emulsifies properly. If the mixture looks curdled, it's fine—it'll smooth out when you add the flour.
- Alternate wet and dry:
- Start with flour, then milk, then flour again, ending with flour. Mix only until combined; overmixing develops gluten and gives you a tough cake.
- Bake:
- Pour the batter into your pan, smooth the top gently, and bake for 30-35 minutes until a toothpick comes out clean or with just a few crumbs. The cake will look slightly underdone compared to other cakes, but that's perfect.
- Cool completely:
- Let the cake cool in the pan on a wire rack until it's completely room temperature. This prevents the frosting from melting.
- Make the buttercream:
- Beat the butter until creamy, then gradually add the sifted powdered sugar so you don't create clouds of sugar dust. Add milk and vanilla and beat for 5 minutes until it's light and fluffy.
- Tint your frosting:
- Divide the buttercream into bowls and add gel coloring drop by drop. For rose colors, use reds, pinks, and yellows; add green for leaves and keep some white for the base coat.
- Base coat:
- Spread a thin layer of white buttercream all over the cooled cake with an offset spatula. This creates a smooth canvas for your roses.
- Pipe your decorations:
- Fit piping bags with rose tips and leaf tips, fill them with your tinted buttercream, and pipe roses in clusters, leaves in between. Take your time here—it's meditative and there's no rushing beauty.
- Add your message:
- Use a small round tip to pipe a graduation message or congratulations message across the cake in a contrasting color.
 Save
Save There's something special about the moment when a sheet cake transforms from a simple slab of vanilla into a decorated masterpiece. It becomes the centerpiece of a celebration, a tangible expression of effort and care that people remember long after they've eaten the last crumb.
Rose Piping Techniques That Actually Work
The first time I piped a rose, I gripped the piping bag like it was trying to escape and ended up with something that looked more like a deflated balloon. The secret is holding the bag at a 45-degree angle and moving your wrist gently, letting the tip do the work. Start with a dot in the center, then spiral outward with slight pressure, releasing as you pull away. Practice on parchment first—nobody will see those attempts, and you'll build confidence. Each rose takes maybe thirty seconds once you get the rhythm, and honestly, imperfect roses look more charming than perfect ones anyway.
Storage and Make-Ahead Magic
This cake actually improves a day after baking because the crumb has time to settle and absorb moisture, making it even more tender. You can bake the layers a full day ahead, wrap them tightly, and frost the next day without any loss of quality. If you need to frost it even earlier, bake it two days before, wrap well without frosting, and you're fine. The decorated cake keeps covered at room temperature for up to two days, or in the fridge for up to five days—though it tastes best when served at room temperature, so pull it out an hour before serving.
Variations and Personal Touches
The vanilla cake is already a blank canvas, which is part of its brilliance, but don't feel locked into plain. You can substitute ¾ cup of the flour with cocoa powder for a subtle chocolate version that still lets the delicate frosting shine. If you're making this for someone with a favorite color, lean into it—make the roses all one color, or create an ombré effect by gradually shifting from light to dark. The piping is where you make it personal; some people spell out the graduate's name, others create a garden of roses with leaf accents, and some add tiny dots or pearls of white between blooms for a touch of elegance. Trust your instincts and remember that handmade imperfections are exactly what make a cake feel special.
- Chocolate lovers: Mix ¾ cup cocoa powder with the dry ingredients for a two-tone effect that looks sophisticated.
- Flavor boosters: Add almond extract (¼ tsp) alongside vanilla for a subtle depth that people won't be able to name.
- Extra stability: If your kitchen is warm, chill the piping bags and frosting between roses to prevent the buttercream from softening.
 Save
Save This cake has a way of becoming the highlight of a celebration, not just because it tastes wonderful, but because you made it with intention for someone you care about. That's the real decoration.
Recipe Questions
- → What makes the cake moist and soft?
The combination of whole milk and creamed butter with sugar ensures a tender, moist crumb in the vanilla base.
- → How is the buttercream colored for decoration?
Gel food coloring is added to portions of buttercream to create vibrant roses and leaves with piped detail.
- → Can this dessert be prepared ahead of time?
Yes, once cooled and decorated, it can be stored covered at room temperature for 2 days or refrigerated up to 5 days.
- → Are there variations to the flavor?
Chocolate variation can be made by substituting part of the flour with unsweetened cocoa powder for a cocoa-infused base.
- → What tools are recommended for decorating?
Use piping bags fitted with petal and leaf tips, along with an offset spatula and wire rack for cooling and finishing touches.