 Save
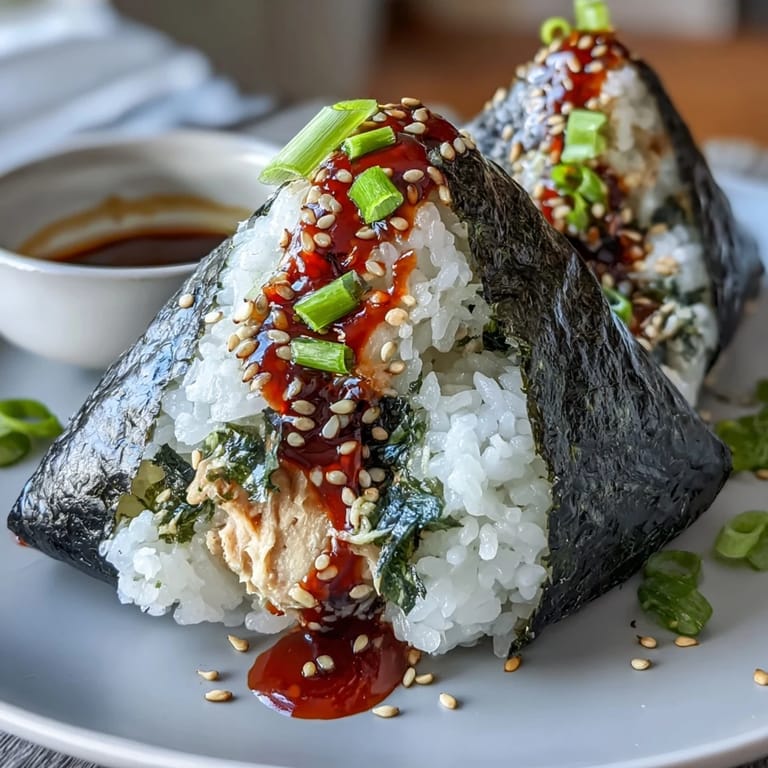
Save My coworker came back from Tokyo with a container of these spicy tuna onigiri, and I watched her unwrap them at lunch like they were precious little gifts. The way the nori crackled when she bit into one, the steam that escaped—I had to learn how to make them myself. Turns out, they're easier than they look, and now I bring them everywhere, from picnics to late-night study sessions.
I made these for my friend who was training for a marathon, and seeing her face light up when she realized she had six perfect little rice balls to grab throughout the week made me understand why onigiri is practically Japan's answer to the lunchbox. She'd text me photos of where she was eating them—on a train, at a café, in her car—and somehow that made the recipe feel less like cooking and more like sending little edible care packages.
Ingredients
- Japanese short-grain rice (2 cups): This is the foundation, and it matters—the starch holds everything together in a way that long-grain rice just won't, so don't try to substitute.
- Water (2 1/4 cups): The ratio changes everything, so measure carefully or trust your rice cooker's markings completely.
- Rice vinegar (1 tablespoon): This brightens the rice without overpowering it, giving that subtle tang that makes store-bought ones taste flat by comparison.
- Sugar and salt (1 teaspoon and 1/2 teaspoon): Balance each other out to season the rice perfectly—taste as you go because everyone's preference is a little different.
- Canned or sushi-grade tuna (5 oz / 140 g): Canned works beautifully and honestly tastes just as good once mixed with the mayo and sriracha, but raw tuna elevates it if you're feeling fancy.
- Kewpie mayonnaise (2 tablespoons): The Japanese version is tangier and richer than regular mayo, and it makes a noticeable difference, but regular mayo won't ruin anything.
- Sriracha (1 teaspoon): Start with less and work your way up because it builds heat, and the last thing you want is onigiri that make people cough.
- Soy sauce, sesame oil, and green onion: These three together create depth—the soy adds savory umami, the sesame oil brings warmth, and the green onion cuts through everything with freshness.
- Nori sheets (3 sheets, halved): The seaweed wrapping happens at the end and keeps your hands from sticking to the rice, so don't skip it even if you think you don't like nori.
- Toasted sesame seeds (optional): They add a nutty crunch and look beautiful, though I've made plenty without them and nobody complained.
Tired of Takeout? 🥡
Get 10 meals you can make faster than delivery arrives. Seriously.
One email. No spam. Unsubscribe anytime.
Instructions
- Rinse and cook your rice:
- Run the rice under cold water, stirring gently with your fingers until the water runs clear—this removes starch that would otherwise make the rice gummy. Combine with 2 1/4 cups water and cook according to your rice cooker or pot instructions, then let it sit undisturbed for 10 minutes; this resting period is when the rice firms up just enough to handle without falling apart.
- Season the rice while it's warm:
- Dissolve the vinegar, sugar, and salt together first, then fold it gently into the warm rice using a wooden spoon or rice paddle, moving from the edges toward the center. Let it cool to room temperature so the vinegar flavor settles in and the rice becomes easier to shape without burning your hands.
- Make the spicy tuna mixture:
- Drain your tuna thoroughly if it's canned, then combine it with mayo, sriracha, soy sauce, sesame oil, and green onion in a small bowl. Mix until it's evenly distributed, then taste a tiny spoonful and adjust the sriracha up or down—you want heat that lingers, not shock your mouth.
- Set up your shaping station:
- Have a small bowl of water nearby to keep your hands wet, and a pinch of salt ready to sprinkle on your palms—this prevents the rice from sticking while giving the outside a subtle salty crust. Fill a cup or bowl so you can measure out roughly 1/2 cup of rice for each onigiri, which gives you the right proportion of filling to rice.
- Shape the onigiri:
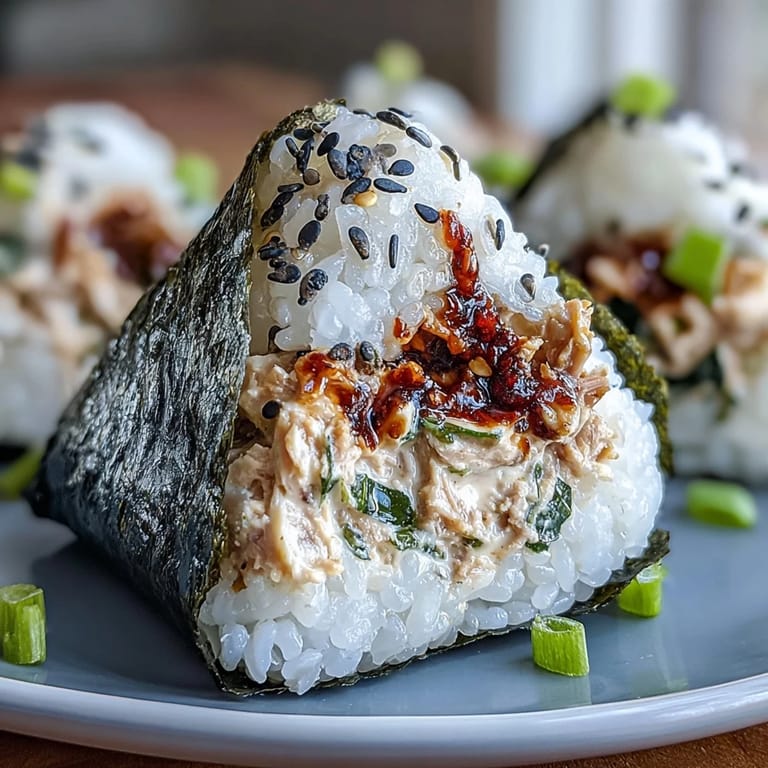
- Wet your hands and sprinkle lightly with salt, then gently press the measured rice into a thin, slightly cupped palm. Add 1 to 2 teaspoons of the spicy tuna filling right in the center, then fold the rice up and around it like you're protecting a secret, pressing firmly enough that it holds together but gently enough that you don't crush it into a dense brick.
- Wrap with nori and finish:
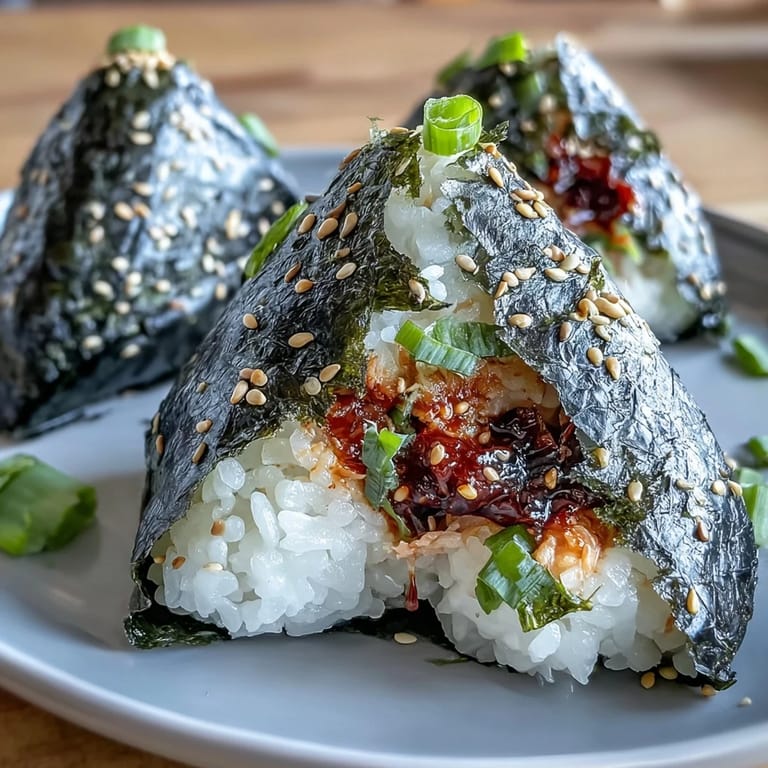
- Once your onigiri is shaped into a triangle or ball (triangles are more forgiving), wrap a strip of nori around the bottom third like a little belt, which both looks professional and gives you something to hold without getting sticky fingers. Sprinkle with toasted sesame seeds if you have them, then serve immediately or wrap in plastic wrap for storage.
 Save
Save There's something almost meditative about shaping these rice balls, the same way some people find peace in kneading bread. The repetition, the small victory of each one holding together—it's the kind of cooking that quiets your mind while your hands stay busy.
Getting the Rice Temperature Right
I used to try seasoning the rice while it was piping hot, and the vinegar would evaporate too quickly, leaving the rice tasting bland. Now I wait until it's just warm enough to handle, and the seasoning absorbs instead of escaping. Temperature is one of those invisible things that completely changes the outcome.
When Spicy Tuna Filling Works Best
The first time I made these, I mixed everything hours ahead, and by lunchtime the sriracha had mellowed out so much that nobody felt any heat. Now I prep the components separately and combine them just before assembly, which keeps the spice alive and the flavors distinct instead of blending into one muddy note. It's a small timing shift that makes a real difference.
Storage and Make-Ahead Tips
These keep beautifully wrapped in plastic wrap for up to two days in the fridge, though they taste best at room temperature. Honestly, I wrap them as soon as they're cool enough to handle, which protects them and makes them feel like actual prepared food instead of something you're still fussing with.
- Wrap them individually in plastic wrap or in a container with parchment between layers so they don't stick together.
- If the nori gets soft from humidity, you can wrap it fresh right before eating and the onigiri will taste crispy and new.
- They're equally good straight from the fridge or sitting out for a few hours, which makes them perfect for unpredictable schedules.
 Save
Save Making onigiri is one of those kitchen skills that pays dividends—once you nail the shape, you can fill them with anything from pickled plums to sesame paste, and they'll always be delicious. I've converted at least three people from "I could never make those" to bringing homemade batches to work.
Recipe Questions
- → What type of rice is best for making onigiri?
Japanese short-grain rice is preferred for its sticky texture, which helps the onigiri hold its shape.
- → Can I use raw tuna instead of canned for the filling?
Yes, sushi-grade raw tuna finely diced works well for a fresher taste and texture.
- → How do I prevent rice from sticking to my hands when shaping onigiri?
Wet your hands with water and lightly sprinkle salt before handling the rice to keep it from sticking and to season the exterior.
- → What alternatives exist for spicy sauce in the filling?
Sriracha is common, but you can substitute other hot sauces or adjust the amount to control heat levels.
- → Is toasting sesame seeds before adding them recommended?
Yes, toasting sesame seeds enhances their nutty flavor and adds a subtle crunch when sprinkled on the onigiri.
- → Can onigiri be stored and eaten later?
Onigiri can be wrapped in plastic wrap and refrigerated, but is best enjoyed fresh for optimal texture and flavor.