 Save
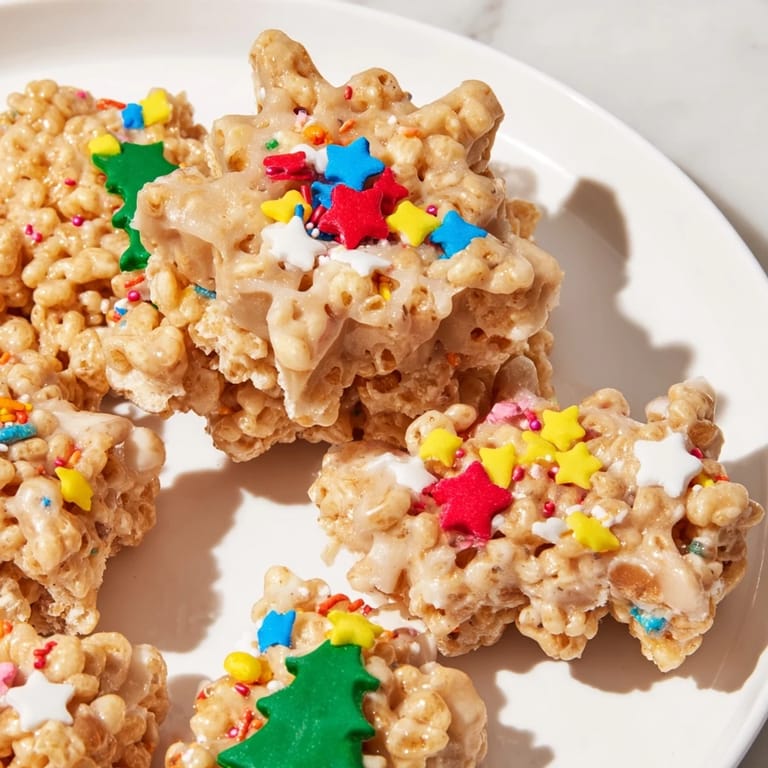
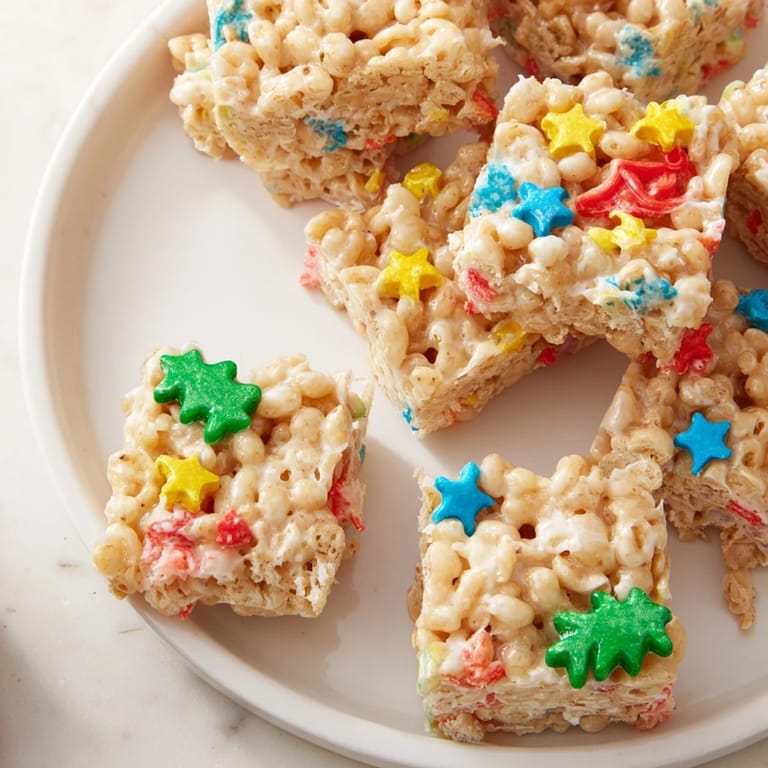
Save Cookie Cutter Shaped Rice Krispies Treats turn a beloved classic into a delightful, hands-on snack that's perfect for every occasion. These fun, chewy treats are easy to make and even easier to enjoy — shaped with cookie cutters to add a spark of creativity and excitement to kids' parties, lunchboxes, or a tasty afternoon pick-me-up.
Save This classic dessert brings back childhood memories while inviting a new generation to get creative with fun shapes and colorful decorations. Whether you're crafting little holiday shapes or brightening up a birthday party, these Rice Krispies treats are sure to be a crowd-pleaser.
Ingredients
Tired of Takeout? 🥡
Get 10 meals you can make faster than delivery arrives. Seriously.
One email. No spam. Unsubscribe anytime.
- Base
- 3 tablespoons (45 g) unsalted butter
- 1 package (10 oz / 285 g) mini marshmallows
- 6 cups (150 g) Rice Krispies cereal
- Decoration (optional)
- Assorted sprinkles
- Melted chocolate (white, milk, or dark)
- Colored icing pens
Instructions
- 1. Prepare the baking sheet
- Line a large baking sheet with parchment paper or lightly grease it.
- 2. Melt the butter
- In a large saucepan, melt the butter over low heat.
- 3. Add marshmallows
- Add the marshmallows and stir continuously until completely melted and smooth. Remove from heat.
- 4. Combine with cereal
- Gently fold in the Rice Krispies cereal, mixing until evenly coated.
- 5. Press mixture
- Using a buttered spatula or wax paper, press the mixture evenly into the prepared baking sheet to about 1–1.5 cm (½ inch) thickness.
- 6. Cool
- Let cool for 10–15 minutes, or until set but still slightly soft.
- 7. Cut shapes
- Use cookie cutters to cut fun shapes from the slab. Press firmly and wiggle slightly for clean edges.
- 8. Decorate
- Decorate with sprinkles, drizzle with melted chocolate, or use icing pens as desired.
- 9. Serve or store
- Serve immediately or store in an airtight container for up to 3 days.
Zusatztipps für die Zubereitung
For easier mixing and handling, lightly grease your hands or spatula to prevent sticking. Using holiday- or theme-shaped cookie cutters adds festive charm and makes these treats perfect for any occasion.
Varianten und Anpassungen
Try mixing in mini chocolate chips or rainbow sprinkles for a colorful twist. For a dairy-free version, substitute vegan butter and marshmallows to suit special dietary needs.
Serviervorschläge
These treats are delicious on their own or dressed up with colorful sprinkles, chocolate drizzles, or icing details. Pack them in lunchboxes, serve at parties, or enjoy anytime as a fun, chewy snack.
 Save
Save With these simple steps and creative touches, Cookie Cutter Shaped Rice Krispies Treats become more than just a snack—they turn into a joyful activity and a tasty treat that brings smiles to everyone’s faces.
Recipe Questions
- → How do I prevent the mixture from sticking when cutting shapes?
Lightly grease your hands, spatula, and cookie cutters with butter or non-stick spray to ensure clean edges and easy handling.
- → Can I use different shapes other than cookie cutters?
Yes, any firm molds or cutters can provide various shapes, allowing creative variations for special occasions or themes.
- → What are some decoration options to enhance these treats?
Decorate with assorted sprinkles, drizzle melted chocolate, or use colored icing pens for personalized designs.
- → How long do these treats stay fresh?
Store them in an airtight container at room temperature for up to 3 days to maintain softness and freshness.
- → Is there a way to make these treats dairy-free?
Substitute the butter with vegan alternatives and use dairy-free marshmallows to accommodate dairy-free diets.
- → What is the best method to melt marshmallows evenly?
Melt butter over low heat, then add marshmallows gradually, stirring constantly until smooth to avoid burning or uneven melting.