Save
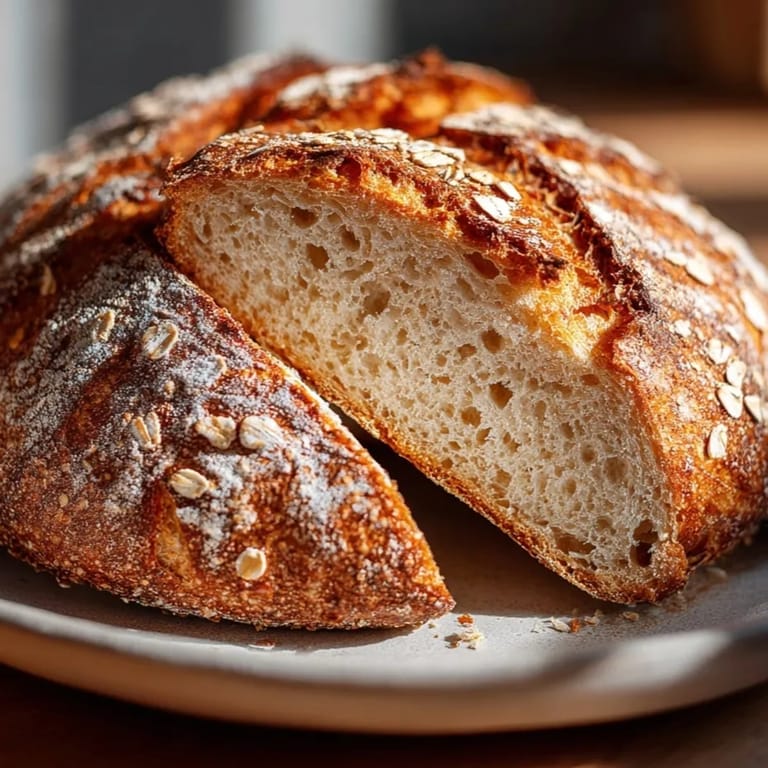
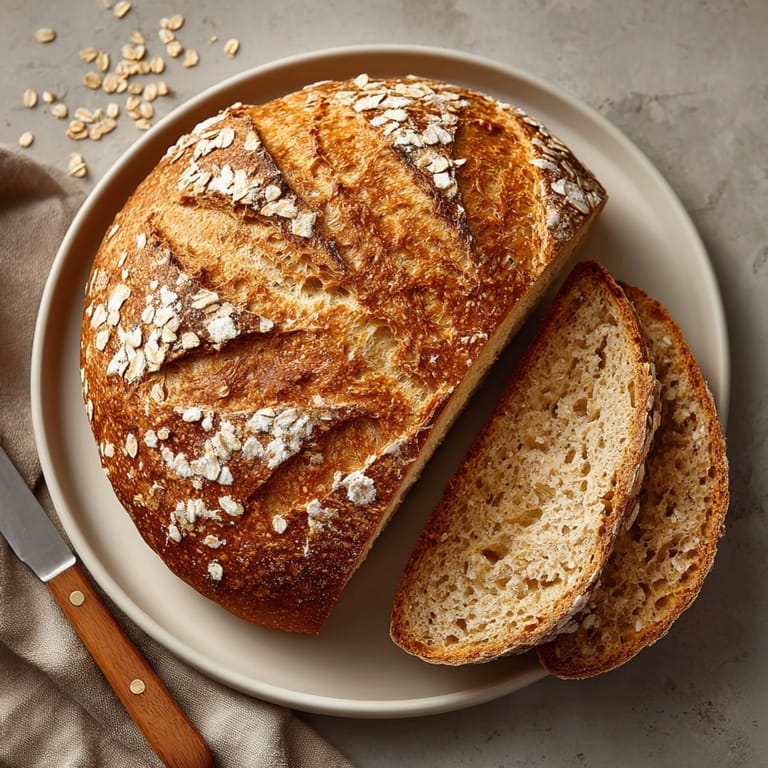
Save This rustic honey oat no-knead bread transforms simple ingredients into a bakery-worthy loaf with minimal effort. The overnight fermentation develops complex flavors while you sleep, resulting in a crusty exterior and tender, slightly sweet interior studded with hearty oats.
I first made this bread during a particularly busy week when I couldn't face the thought of kneading dough. The magical transformation that happened overnight convinced me that sometimes less work yields better results. Now it's my go-to when I want to impress guests without spending hours in the kitchen.
Ingredients
- Bread flour: provides higher protein content for better gluten development and chewier texture
- Old-fashioned rolled oats: add hearty texture and nutty flavor while absorbing moisture for a tender crumb
- Kosher salt: enhances flavor and controls yeast activity look for coarse kosher salt rather than table salt
- Instant yeast: works quickly without needing activation choose a reliable brand with good reviews
- Honey: contributes subtle sweetness and helps with browning select a local variety for unique flavor notes
- Warm water: activates the yeast and forms the dough use filtered water at 100°F for best results
Tired of Takeout? 🥡
Get 10 meals you can make faster than delivery arrives. Seriously.
One email. No spam. Unsubscribe anytime.
Instructions
- Mix the dry ingredients:
- Combine bread flour, oats, salt, and yeast in a large bowl, stirring thoroughly with a wooden spoon to ensure even distribution. This uniform mixture ensures consistent flavor and texture throughout your finished loaf.
- Add wet ingredients:
- Pour in the honey and warm water, then mix until a shaggy, sticky dough forms. Don't worry about achieving a smooth texture at this stage. The mixture should look somewhat messy with all flour incorporated. The dough will be stickier than traditional bread dough.
- First rise:
- Cover the bowl tightly with plastic wrap or a damp kitchen towel and let it sit at room temperature for 8-12 hours. This long, slow fermentation develops complex flavors and gluten structure without kneading. The dough should double in size and appear bubbly on the surface. Cooler room temperatures may require longer rise times.
- Shape the loaf:
- Lightly dust your work surface with flour and gently turn out the dough. Fold it over itself 2-3 times to create surface tension, then shape into a ball by cupping your hands around the edges and rotating. Place seam-side down on parchment paper, brush with water, and sprinkle generously with additional oats, pressing gently to adhere.
- Second rise:
- Cover shaped dough loosely with a clean kitchen towel and let rest for 30-45 minutes while your oven and Dutch oven preheat. The dough will relax and slightly expand during this time, though it won't double in size. This shorter rise gives the yeast a final boost before baking.
- Preheat baking vessel:
- Place your Dutch oven with its lid into the cold oven and heat to 450°F for at least 30 minutes. This creates an intensely hot environment that mimics professional steam ovens, producing that characteristic artisan crust. The longer preheating ensures the Dutch oven is thoroughly heated.
- Transfer and score:
- Using the parchment paper as a sling, carefully lower the dough into the preheated Dutch oven. With a sharp knife or bread lame, quickly score the top with a 1/4-inch deep slash to control expansion. Work confidently but carefully around the extremely hot Dutch oven.
- Covered bake:
- Replace the lid and bake for 30 minutes. The covered environment traps steam from the dough, creating the perfect humid environment for initial rise and crust development. The bread will undergo significant expansion during this phase.
- Uncovered bake:
- Remove the lid and continue baking for 12-15 minutes until deeply golden brown. This final uncovered bake develops the rich color and crispy texture. Look for a hollow sound when tapping the bottom of the loaf to confirm doneness.
- Cooling period:
- Transfer the finished bread to a wire rack and allow it to cool completely before slicing. This crucial step allows the interior structure to set and moisture to redistribute. Cutting too soon results in a gummy texture and loss of moisture.
 Save
Save The honey in this recipe is truly transformative. I once substituted plain sugar when I ran out of honey, and while the bread was good, it lacked that distinctive mellow sweetness and beautiful golden color. My family immediately noticed the difference and requested I never skip the honey again. There's something magical about how it enhances the nutty oat flavor.
Storage Secrets
This bread maintains its best texture at room temperature for up to 3 days when stored properly. After cooling completely, place it cut-side down on a cutting board or wrap in a clean kitchen towel. Avoid plastic bags which trap moisture and soften the crust. To refresh slightly stale bread, sprinkle with water and heat in a 350°F oven for 5-10 minutes.
For longer storage, slice the completely cooled bread and freeze in an airtight container with parchment paper between slices for up to 3 months. This method allows you to thaw individual slices as needed. Toast frozen slices directly from the freezer for the freshest taste.
Simple Variations
While this recipe is perfect in its classic form, several easy modifications can create entirely new flavor profiles. Add 1/3 cup of sunflower or pumpkin seeds to the dough for extra crunch and nutrition. Replace 1/2 cup of bread flour with whole wheat flour for deeper flavor and additional fiber. For a sweeter breakfast bread, increase honey to 3 tablespoons and add 1/2 cup dried cranberries or raisins to the dough.
Troubleshooting Guide
If your bread spreads too much rather than rising upward, your dough may be too wet. Next time, add an extra 2-3 tablespoons of flour during mixing. For a denser loaf that doesn't rise enough, check your yeast freshness and ensure your water temperature isn't too hot, which can kill yeast. If the bottom crust burns, place a baking sheet on the rack below your Dutch oven to buffer direct heat.
Perfect Pairings
This versatile bread complements nearly any meal but truly shines alongside hearty soups and stews, where its sturdy texture stands up to dipping. For breakfast, toast thick slices and top with ricotta and honey for a simple yet luxurious start to your day. Create memorable sandwiches with roasted vegetables, goat cheese, and a drizzle of balsamic glaze.
The bread also makes an excellent base for bruschetta or crostini when sliced thin and toasted with olive oil. For a special occasion cheese board, serve alongside aged cheddar, fig jam, and fresh fruit.
 Save
Save This no-knead bread is a testament to patience and simple ingredients. Enjoy the satisfaction of baking beautiful, flavorful bread with minimal hands-on time.
Recipe Questions
- → How can I ensure a crisp crust on this loaf?
Spritz the loaf with water before baking and bake it covered for the first 30 minutes, then finish uncovered for a crunchy crust.
- → What can I use instead of honey?
Maple syrup or agave nectar are great alternatives that maintain sweetness and moisture without changing texture.
- → Is this loaf good for sandwiches?
Yes, its sturdy crumb holds up well to sandwich fillings while remaining moist and flavorful inside.
- → Can I use quick oats instead of rolled oats?
Rolled oats provide more texture, but quick oats may be substituted if needed, although the loaf will be slightly softer.
- → What’s the best way to store the loaf?
Let it cool completely, then store in a paper bag or wrapped in a cloth at room temperature for up to 3 days, or freeze for longer storage.
- → Is this bread suitable for gluten-free diets?
No, this loaf contains bread flour and oats that are not certified gluten-free. Always check oat packaging for cross-contamination if gluten sensitive.