 Save
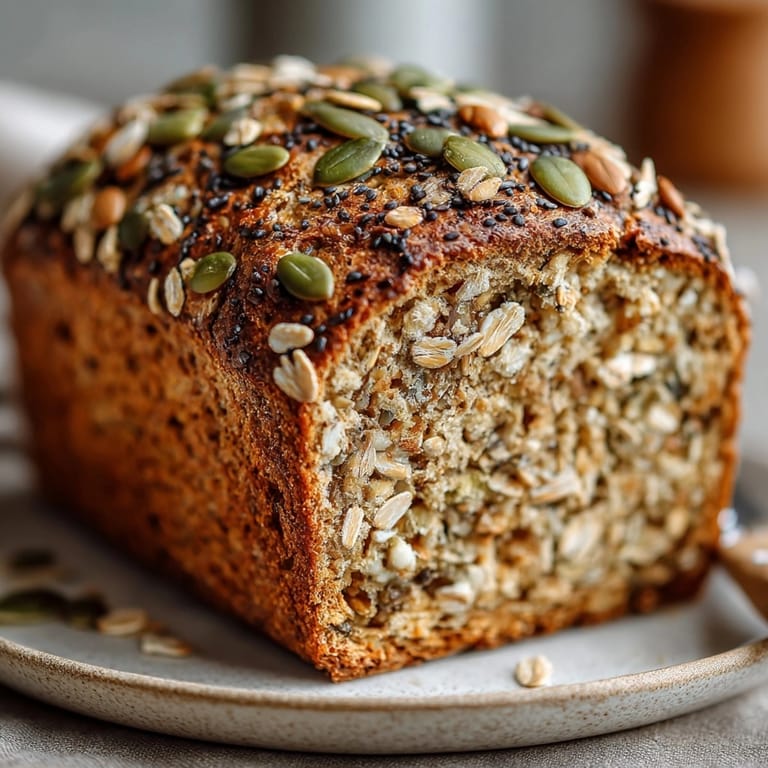
Save This multigrain sandwich bread transforms everyday sandwiches into something special with its perfect balance of nutty flavor and tender crumb. After years of bread baking, I've refined this recipe to create a loaf that's both nutritious and delicious – sturdy enough for hearty sandwiches yet soft enough for morning toast.
I first developed this recipe during a snowstorm when I couldn't make it to the store. My family was so impressed by the result that store bought bread is now a distant memory in our household.
Ingredients
- Rolled oats: add wonderful texture and a subtle sweetness to the crust and interior
- Sunflower seeds: provide a buttery crunch and healthy fats
- Flaxseeds: contribute omega 3 fatty acids and a pleasant nuttiness
- Millet: offers tiny pops of crunch throughout the bread
- Sesame seeds: bring their distinctive nutty flavor
- Pumpkin seeds: add beautiful green flecks and nutritional value
- Bread flour: provides structure through higher protein content
- Whole wheat flour: contributes hearty flavor while maintaining softness
- Rye flour: adds complexity and helps keep the bread moist longer
- Dry milk powder: enhances tenderness and creates a softer crumb
- Fine sea salt: balances flavors and controls yeast activity
- Honey: feeds the yeast and adds subtle sweetness
- Butter: enriches the dough for a more tender result
- Active dry yeast: creates the perfect rise
Tired of Takeout? 🥡
Get 10 meals you can make faster than delivery arrives. Seriously.
One email. No spam. Unsubscribe anytime.
Instructions
- Activate the Yeast:
- Combine warm water around 105°F with honey and yeast in a small bowl. The temperature is crucial here not too hot or it will kill the yeast, not too cool or it won't activate properly. Let this mixture sit undisturbed for 5 minutes until it becomes foamy and fragrant. This step proves your yeast is alive and ready to work.
- Create the Seed and Flour Mixture:
- In a large bowl, whisk together bread flour, whole wheat flour, rye flour, milk powder, and salt until evenly distributed. This ensures no pockets of salt that could kill yeast. Then add all seeds and grains, stirring to distribute them evenly throughout the dry ingredients. This technique ensures the seeds don't all sink to the bottom of the loaf.
- Form the Initial Dough:
- Pour your foamy yeast mixture and melted butter over the dry ingredients. Use a wooden spoon to combine everything until no dry flour remains. The dough will look rough and shaggy at this point which is perfect. You want it just cohesive enough to handle but not overmixed.
- Develop the Gluten:
- Turn the dough onto a lightly floured surface and knead vigorously for 8 to 10 minutes. The dough will transform from rough to smooth and elastic. When properly kneaded, it should pass the windowpane test gently stretch a small piece until translucent without tearing. This development of gluten is essential for proper structure.
- First Rise:
- Shape the kneaded dough into a tight ball and place in an oiled bowl, turning once to coat all sides. Cover with a clean kitchen towel or plastic wrap and let rise in a draft free warm spot until doubled in size, approximately one hour. The ideal temperature is around 75°F to 80°F.
- Shape the Loaf:
- Once doubled, gently press down on the dough to deflate it. On a clean surface, shape it into a tight log the length of your loaf pan by folding the dough like a letter and then rolling it up tightly. Place the shaped dough seam side down in your greased 9x5 inch loaf pan.
- Second Rise:
- Cover the pan loosely with a kitchen towel and allow the dough to rise again until it crowns about 1 inch above the rim of the pan, typically 35 to 45 minutes. This second rise creates the final texture and volume of your bread. The dough should look puffy and will slowly spring back when gently poked.
- Prepare for Baking:
- While the dough completes its second rise, preheat your oven to 375°F to ensure it reaches the proper temperature. Just before baking, brush the top of the loaf with water and sprinkle with additional seeds or oats for a decorative finish and extra texture.
- Bake to Perfection:
- Place the loaf in the center of your preheated oven and bake for 30 to 35 minutes, rotating halfway through for even browning. The bread is done when it reaches an internal temperature of 190°F to 200°F or sounds hollow when tapped on the bottom. The crust should be deeply golden and aromatic.
- Cool Completely:
- Remove the baked loaf from the pan immediately and place on a wire rack to cool completely, at least 1 hour before slicing. This cooling period is crucial as it allows the crumb structure to set and prevents a gummy texture when sliced.
 Save
Save The combination of three different flours is what makes this bread special. I learned through many experiments that the ratio of bread flour to whole grains is crucial for creating a loaf that rises well while maintaining the nutritional benefits and flavor of whole grains. My grandmother taught me this technique, and I still think of her whenever I smell this bread baking.
Storage Tips
This multigrain bread stays fresh at room temperature for up to 3 days when stored in a bread box or paper bag. For longer storage, slice the completely cooled loaf and freeze it with parchment paper between slices for easy removal. When ready to enjoy, toast frozen slices directly from the freezer for the freshest taste. Avoid storing this bread in the refrigerator as it will actually accelerate staling due to starch retrogradation.
Customizing Your Grain Mix
The beauty of this recipe lies in its flexibility. You can customize the seed and grain mixture based on what you have available or your personal preferences. Try substituting amaranth for millet, add wheat berries for extra chew, or incorporate quinoa for additional protein. Just maintain the same total volume of add ins for consistent results. My family particularly enjoys the addition of toasted walnuts for special occasions, which adds a wonderful buttery richness to the finished loaf.
Troubleshooting Common Issues
If your bread isn't rising properly, check the freshness of your yeast and ensure your water temperature is correct. For a denser loaf with more whole grain flavor, increase the proportion of whole wheat and rye flours, but be prepared for a slightly heavier texture. If your bread is crumbling when sliced, allow it to cool completely before cutting and use a sharp serrated knife with a gentle sawing motion. Slicing too early is the most common mistake even experienced bakers make.
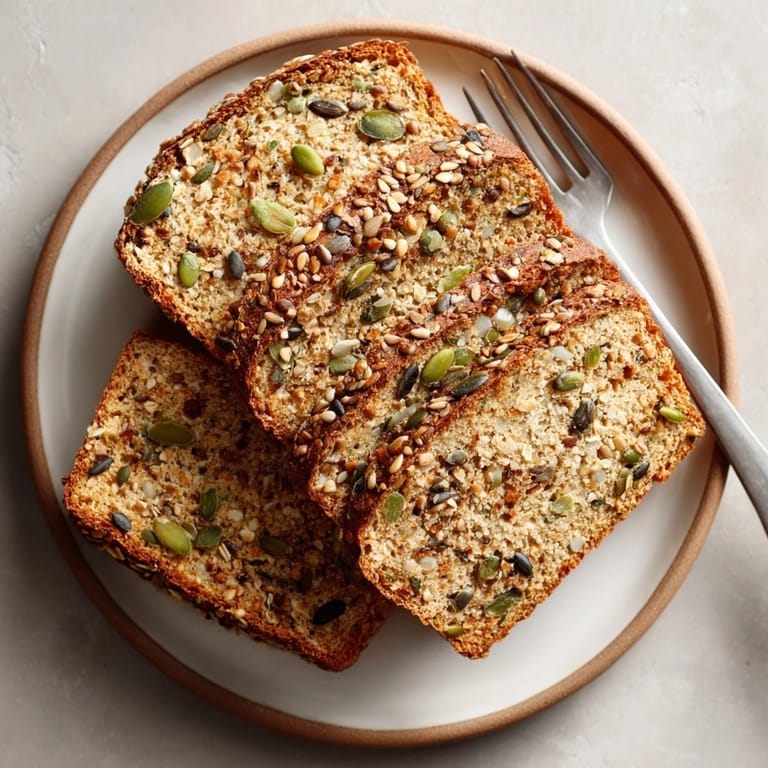
Serving Suggestions
This versatile bread makes an excellent foundation for avocado toast topped with microgreens and a sprinkle of red pepper flakes. For lunch, try layering roasted vegetables, hummus, and arugula between two hearty slices. The bread also pairs beautifully with soups, especially hearty bean or vegetable varieties where you can use it to soak up every last drop. For a special breakfast, transform it into French toast with a sprinkle of cinnamon for a nutritious start to your day.
 Save
Save This flavorful and nutritious bread is perfect for any meal. Enjoy it fresh from the oven or toasted for a delightful crunch.