 Save
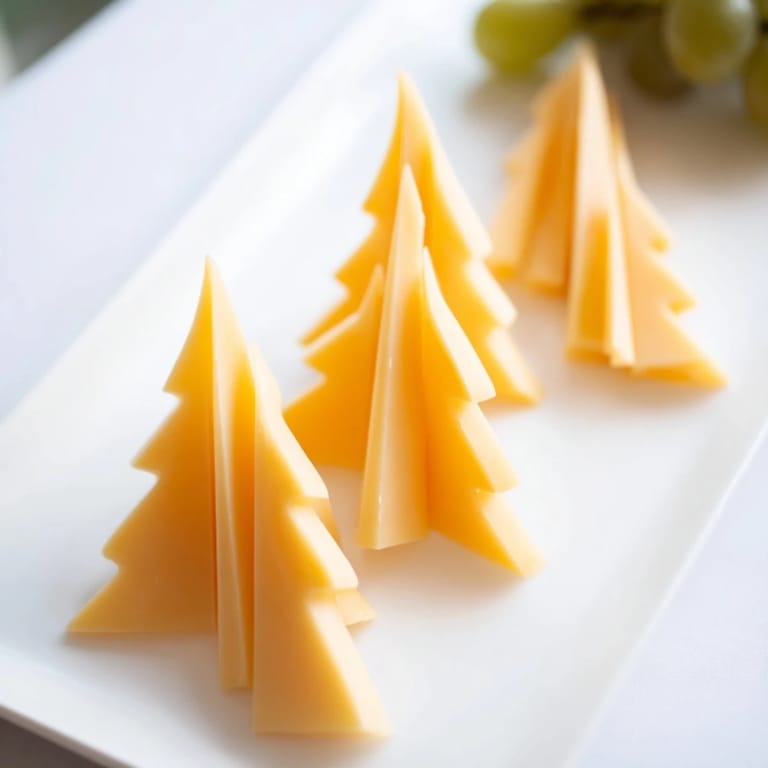
Save I'll never forget the year my sister asked me to design the cheese board for our family's Christmas Eve gathering. I'd always loved how the most memorable holiday tables told a story through their presentation, and that's when the idea struck me—what if we arranged the cheese itself into something festive? I spent that afternoon slicing semi-firm cheese into thin triangles and nestling green grapes between them, creating a border of tiny stylized pine trees around the platter. When everyone arrived and saw it, their faces lit up. It wasn't just food anymore; it was a centerpiece that sparked conversation and joy before anyone even took a bite.
I made this for a potluck last December where I almost didn't go—I was tired and thought about staying home. But I threw together this festive cheese border anyway, and watching a room full of near-strangers light up when they saw it, watching kids point at the 'tree' design, made me realize that these small moments of creative presentation are the ones that get remembered. One guest asked me how long it took, and when I said fifteen minutes, she looked shocked. That's the secret right there.
Ingredients
- Semi-firm cheese (Gouda, Edam, or Emmental), 250g, well chilled: The key here is choosing a cheese that's firm enough to hold a clean cut but not so hard that it shatters. I learned early on that chilling the cheese makes all the difference—it slices like butter when it's cold, giving you those beautiful, clean triangles that catch the light. Gouda brings a subtle sweetness, Edam is mild and approachable, and Emmental adds a slightly nutty note.
- Small green seedless grapes, 150g, washed and thoroughly dried: These grapes are your secret detail. Dry them well before you start—any moisture will make them slip around as you're building your border. Their bright color against the golden cheese creates that festive contrast that makes people do a double-take.
Tired of Takeout? 🥡
Get 10 meals you can make faster than delivery arrives. Seriously.
One email. No spam. Unsubscribe anytime.
Instructions
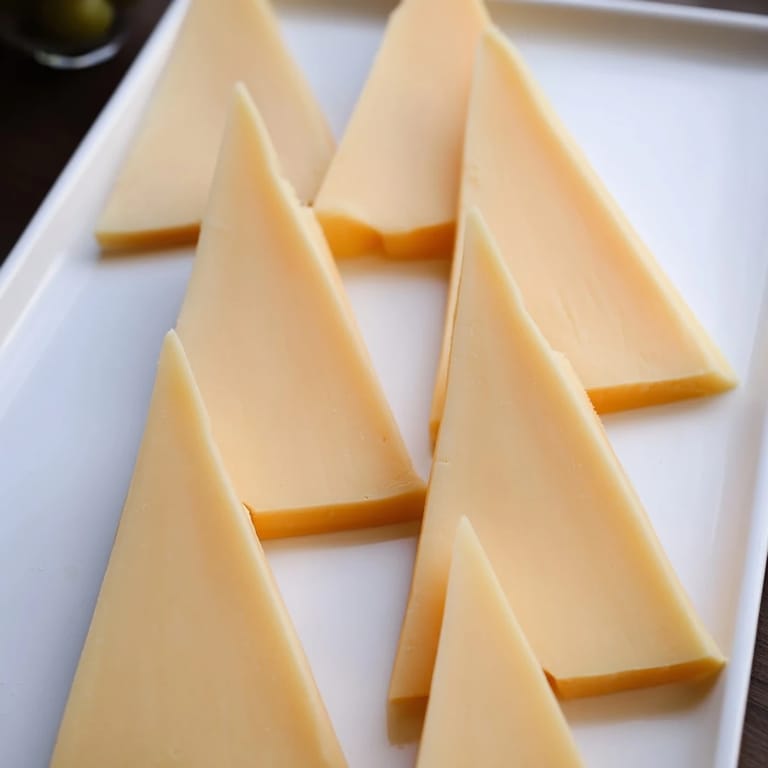
- Chill and slice the cheese into tree shapes:
- Take your block of cheese straight from the fridge—it should be almost cold to the touch. Using a sharp chef's knife, slice the cheese into thin triangular pieces about 5 to 6 centimeters long and roughly 1 centimeter wide at the base. Think of them as tiny pine trees with a pointed top. Don't worry if they're not perfectly uniform; slight variations actually look more organic and natural. You'll feel the knife glide through the cold cheese, and each slice should be thin enough to see light through it.
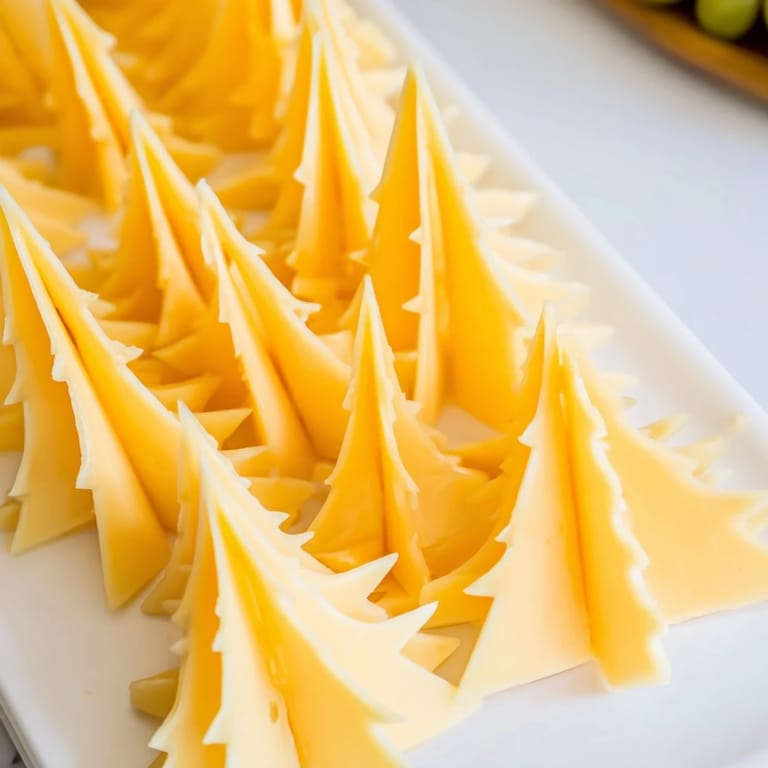
- Arrange the border with intention:
- Start at one corner of your board and begin laying the triangular slices along all four edges, with the points facing outward like branches reaching toward the edge. Slightly overlap them as you go, creating a sense of movement and fullness. This is the part where it starts to feel like you're actually building something, not just arranging food.
- Nestle the grapes between the cheese:
- Now come the grapes—they're the secret to making this feel complete. Gently tuck them between and around the cheese triangles, filling any gaps and reinforcing that tree-like effect. The contrast of deep green against the pale cheese is what makes eyes pause when people first see your board.
- Continue until the border is complete:
- Work your way around the entire perimeter of your platter until the whole edge is framed with your festive design. Step back and look at it from a distance—sometimes you'll spot a gap that needs one more grape or a cheese triangle that could use adjustment.
- Fill the center thoughtfully:
- The border is complete, and now the center of your board is like a canvas waiting for color and variety. Add your favorite cheeses—maybe a creamy brie, a sharp cheddar, some crumbled blue cheese. Add cured meats, crackers, nuts, dried fruit, or fresh herbs. This is where you can let your creativity run wild, knowing you've already created something visually stunning with the border.
 Save
Save There was a moment during that first holiday gathering when my young nephew stopped mid-conversation to study the cheese border, his eyes tracing the triangular shapes. He said, 'It really does look like trees,' with such genuine wonder. That's when I understood—this wasn't about showing off or being fancy. It was about creating something that made people smile and feel like they were part of something thoughtful. It transformed an ordinary cheese board into a memory.
Playing with Color and Details
Once you've mastered the basic green grape design, you'll start seeing endless variations. I've experimented with alternating a few red grapes throughout the border to add warmth and depth, or using pomegranate seeds for a pop of jewel-like color. The beauty of this design is that it's forgiving—it looks festive and intentional no matter what you do. One year I tucked fresh rosemary sprigs between the cheese triangles, and it not only looked like actual pine trees but also filled the whole table with that wonderful evergreen scent. It's these little touches that elevate a cheese board from 'nice' to 'people will be talking about it.'
Choosing Your Cheese with Purpose
The type of semi-firm cheese you choose will subtly change the personality of your board. I've found that Gouda works beautifully for a board with sweeter accompaniments and fig jam, Edam is perfect if you want something mild and universally approachable, and Emmental brings sophistication if you're pairing it with prosciutto and olives. The triangular shape is forgiving enough that any of these cheeses will work, but I love using the same cheese in the border that I feature in the center of the board. It creates a sense of cohesion and intentionality. You might also consider using two different cheeses alternately in your border—maybe Gouda and a white cheese like fresh mozzarella or a creamy aged gouda. The contrast is stunning.
Making It Truly Festive
This is where you can let your imagination guide you toward holiday magic. Beyond the grapes and rosemary, think about what else makes your table feel celebratory. Perhaps you arrange the center with holiday-themed crackers—maybe some with seed toppings or festive shapes. Add a small bowl of honeycomb or fig jam, because the sweetness paired with the salty cheese creates an experience. Consider placing a small votive candle nearby for warmth and ambiance, or tuck some fresh thyme or other herbs around the board. I've even placed small ornaments or scattered edible gold leaf around the border for extra shine. The Tannenbaum border is just the foundation—the rest is you making it your own and creating something that reflects your celebration.
- Remember that the grapes dry best if you wash them several hours ahead and let them sit uncovered in the fridge
- Keep the cheese cold right up until serving time, and your triangles will hold their shape better throughout the gathering
- If you're making this ahead, assemble it no more than a few hours before guests arrive, so the cheese stays fresh and the grapes don't absorb any moisture from the board
 Save
Save Every time I make this border now, I'm reminded that the most meaningful entertaining isn't about elaborate recipes or expensive ingredients—it's about putting thought and care into the details that make people feel seen and celebrated. This simple cheese board does exactly that.
Recipe Questions
- → What cheeses work best for the Tannenbaum border?
Semi-firm cheeses like Gouda, Edam, or Emmental are ideal because they slice cleanly into thin triangles that hold their shape for the pine tree effect.
- → How should I slice the cheese for this border?
Cut the cheese into thin triangular pieces about 5–6 cm long and 1 cm wide at the base to resemble stylized pine trees.
- → Can I use other fruits besides green grapes?
Yes, red grapes or pomegranate seeds can be alternated for extra color, enhancing the festive look of the border.
- → What plating tips improve the overall appearance?
Arrange cheese triangles with points facing outward and nestle grapes between them. Adding fresh rosemary sprigs can simulate pine needles for a natural touch.
- → How long does it take to prepare the board border?
The border takes about 15 minutes to prepare and requires minimal tools like a sharp knife and serving platter.